So, the Evil Scarecrow clothes were covered in the last blog post...it's now time to start looking at the scarecrow costume accessories....this post will be about the gloves and hat.
Clives hands needed to be disguised and covered up...so I took an old pair of gardening/builders gloves and used them as a base. These are actually real suede and fabric heavy duty gloves, already replaced with new ones and the intentions were to recycle the suede finger tips - cutting them off and using them as finger protectors in my jewellery business work. So that is what I have done...and the rest of the gloves got used for this costume!
The finger tips got snipped off (some heavy duty scissors required to cut through the fabric layers and leather).
A wash of diluted dark brown acrylic paint turns them a uniform one colour...and makes them look patchy and dirty and old....well, they were already old...I'm just making them look even older!
Strips of hessian fabric were glued around the hand parts and around each finger and thumbs.
more paint added to make the hessian dirty...and we have one pair of scarecrow gloves...done!
Now for the hat!
This was done 'on the wing'....ie freestyle with just an idea in the head what I wanted it to look like, and no set pattern to go by other than a rough measurement of circumference of Clives head. I sewed the majority of it on my sewing machine...must admit it played along nicely and stitched the hessian like a dream...I wasn't expecting that, but am grateful it did, as this halved the time it would have taken to hand sew!
First I cut out two ovals of hessian fabric, one I kept whole, the other I cut a centre circular section out of the middle (slightly smaller than the head circumference measurement.
Layering the pieces up I stitched them together all around the edge, but leaving and inch or so margin.
I snipped triangles out of the margin/hem, all around the piece.....
...you'll see why, next...
...and then, using the middle cut out bit, turned the whole thing inside out (it's actually now right side out...if you get what I mean!)...so we have a neat turned in hem edge.
Those little triangle excess bit we snipped off? well this prevents too much excess material bunching up inside the brim and keeps it nice and flat.
I then returned to the sewing machine and stitched again around the edge, just a centimeter in from the edge to create a channel. (This is for wire to be threaded in which will strengthen the brim and stop it becoming too floppy). I ironed the fabric to make it flatter and easier to work with too.
The next photo (above) doesn't fully show it...but I then cut out a matching centre hole out of the full side...so the whole thing now looks like a doughnut...so the hat can now properly fit over the head. Why didn't I do this at the very beginning?...well it just created less raw edges to fray in the initial sewing stages...so less mess.
The crown of the hat was next....a bit of rough estimating on the size was done...
...and four tall triangles of hessian fabric were cut. I had to calculate the base width of the triangle, taking into account seam allowance for each piece, x four to be just a fraction larger than the head circumference measurement. Better to err on the large size than to make a hat too small that will not only look to comical and silly, but be uncomfortable to wear.
The triangles were all stitched together along the longest sides only...to form a cone shape.
The cone was turned right side out...so the raw seam edges are on the inside......
....this was then pinned in place onto the brim...and sewn in place, with the seam inside.
Although not done at the time of wearing, I went on to cover the inside seam edge with a strip of cotton fabric. The raw hessian edge is very scratchy and itchy against the head...poor Clive bore it out for the night in question, but it was uncomfortable so I later went back and tidied up the seams.
Armature/garden wire (quite a thick strong one) was then threaded into the channel of the brim. The edges bound together and tucked in neatly so no sharp edges exposed.
I sat for a while fiddling around, shaping the brim...it started to look a bit like the Hogwarts Sorting Hat (Harry Potter)...I was tempted to draw a face on it! lol.....the wire in the brim holds it up nicely and gives great shape and character to the hat.
The whole hat got brushed over with a diluted down black acrylic paint...and hung up to dry.
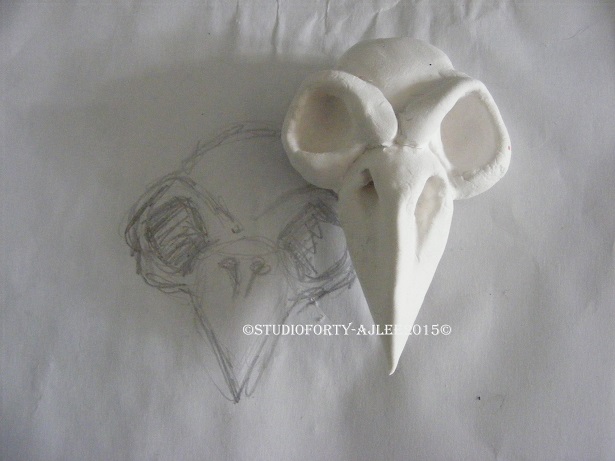
I made a crow skull using paperclay...this stuff is called cloud clay and is ultra light when dry so as an accessory on the hat it doesn't weigh it down.
....drawn out to the rough size I wanted, then sculpted and allowed to dry.....
....then painted it up with a watered down wash of black acrylic paint...brushed on and excess wiped off quickly with a cloth.
and used some thick twisted jute rope to tie it around the base of the hat.
Another two pieces done!
Part 3 will cover the mask and hood.


No comments:
Post a Comment